

Indeed, the instability of a piece of carpet can pose a significant risk, particularly for the elderly, and may lead to slipping accidents with serious consequences.
To address this problem and enhance safety, " Yousef Al-Bashiti Stores " advises you to take the following measures:
- Secure the Carpet:
- Use HPX double-sided carpet tape or non-slip rug pads to secure the carpet to the floor, preventing it from slipping or moving
- Choose Non-Slip Flooring:
- Opt for flooring materials that provide better traction and are less slippery, especially in areas where slips are more likely, such as hallways, entryways, or bathrooms.
- Use Anti-Slip Mats:
- Place anti-slip mats or rugs with rubber backing in areas prone to moisture, like bathrooms or kitchens. These mats provide additional traction and stability.
- Regular Maintenance:
- Keep the floor and carpet clean and dry. Moisture, spills, or debris can increase the likelihood of slipping accidents. Promptly clean up any spills and address wet areas.
- Footwear Awareness:
- Encourage the use of non-slip footwear, especially indoors. Shoes with rubber soles can provide better grip on smooth surfaces.
- Assistive Devices:
- For individuals with mobility challenges, consider using assistive devices such as canes or walkers to provide additional support and stability.
- Carpet Inspection:
- Regularly inspect the condition of the carpet. If there are signs of wear, fraying, or damage, repair or replace the carpet to maintain a safe environment.
- Well-Lit Areas:
- Ensure that areas with carpets are well-lit. Good lighting can help individuals identify potential hazards and reduce the risk of tripping or slipping.
- Handrails and Grab Bars:
- Install handrails or grab bars in areas where slips are more likely, such as staircases or hallways. These provide additional support for individuals to maintain balance.
- Educate and Raise Awareness:
- Educate residents, especially the elderly, about the potential risks of unstable carpets and the importance of taking precautions to prevent accidents.

Exposure to excess moisture or high humidity can have several adverse effects on the respiratory system. Here are some potential issues:
- Mold Growth: Moisture promotes the growth of mold, which can release spores into the air. Inhalation of mold spores can irritate the respiratory system, leading to symptoms such as coughing, wheezing, and difficulty breathing. Individuals with allergies or asthma may be particularly sensitive to mold.
- Dust Mites: High humidity creates an ideal environment for dust mites to thrive. These microscopic organisms can trigger allergic reactions and worsen respiratory conditions, causing symptoms like sneezing, nasal congestion, and coughing.
- Bacterial Growth: Moist conditions can also facilitate the growth of bacteria. Breathing in air contaminated with bacteria can lead to respiratory infections, which may manifest as symptoms ranging from mild respiratory discomfort to more severe conditions like pneumonia.
- Aggravation of Respiratory Conditions: People with pre-existing respiratory conditions, such as asthma or chronic obstructive pulmonary disease (COPD), may experience worsened symptoms in humid environments. High humidity can make it more difficult for individuals with these conditions to breathe comfortably.
- Viral Infections: Excessive moisture can create conditions conducive to the survival and transmission of viruses. Respiratory viruses, such as the flu or common cold viruses, may spread more easily in environments with high humidity.
Certainly, Bashiti Stores We will show you some solutions to address the harmful effects of excess moisture or high humidity on the respiratory system:
- Dehumidifiers: Use dehumidifiers to reduce and maintain optimal humidity levels in indoor spaces. Keeping humidity levels between 30-50% can help prevent mold growth, dust mites, and bacterial proliferation.
An example of it " Bison MOISTURE ABSORBENT DEVICE" . - Ventilation: Ensure proper ventilation in your home by using exhaust fans in areas prone to moisture, such as bathrooms and kitchens. Opening windows and doors to promote air circulation can also help reduce humidity levels.
- Regular Cleaning: Regularly clean and dust your home to prevent the accumulation of mold, dust mites, and other allergens. Pay attention to areas that are more susceptible to moisture, such as basements and crawl spaces.
- Address Leaks and Water Damage: Promptly repair any leaks in the roof, walls, or plumbing to prevent water damage and mold growth. Ensure that the building structure is well-maintained to prevent moisture intrusion.
- Use Air Purifiers: Consider using air purifiers with HEPA filters to remove airborne particles, allergens, and contaminants, promoting cleaner air and better respiratory health.
- Monitor Indoor Plants: While plants can improve air quality, too many indoor plants can contribute to high humidity. Be mindful of the number and type of plants in your living space.
- Proper Storage: Store items susceptible to moisture, such as clothes, books, and linens, in dry and well-ventilated spaces. Consider using moisture-absorbing products in closets or storage areas.
- Regular HVAC Maintenance: Ensure that your heating, ventilation, and air conditioning (HVAC) systems are well-maintained. Change filters regularly to prevent the buildup of dust and mold in the system.
- Educate Yourself: Learn about the specific triggers and allergens that may affect respiratory health in your environment. Being informed allows you to take proactive measures to minimize risks.
- Seek Professional Help: If you experience persistent respiratory symptoms or suspect mold or other issues in your home, consult with professionals, such as HVAC specialists or mold remediation experts, to assess and address the problem.

Broken sun glasses? You do not have to waste them! Use Bison Super Glues, a super fast & easy to use repair adhesive for instant repair results when every second counts.
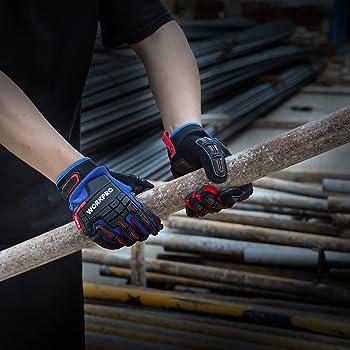
In the world of manual labor and hands-on tasks, ensuring the safety and well-being of workers is of paramount importance. One tool that plays a crucial role in this regard is a reliable pair of protective work gloves. In this blog post, we will delve into the features and benefits of the WORKPRO 40 CR Protective Work Gloves, shedding light on how they contribute to enhanced safety and comfort for workers across various industries. In demanding jobs and hazardous tasks, having the right protective gear is paramount. One such essential item is the WORKPRO 40 CR Protective Work Gloves, designed to offer unparalleled protection, comfort, and durability. In this blog post, we'll dive into the key features and benefits of these gloves, highlighting why they should be your go-to choose for safeguarding your hands during work.

When it comes to hand tools, investing in quality is a decision that can greatly benefit any DIYer or professional. Here are some of the key benefits of investing in quality hand tools:
1. Durability and Longevity: Quality hand tools are built to last. They are made from durable materials and designed with precision and craftsmanship. Investing in quality tools means they will withstand the rigors of regular use and provide reliable performance over an extended period. This saves you money in the long run, as you won't have to constantly replace worn-out or broken tools.
2. Enhanced Performance: Quality hand tools are designed to perform at their best. They offer better ergonomics, precision, and functionality compared to lower-quality counterparts. With high-quality tools, you can expect smoother operation, easier handling, and improved results in your DIY projects. They can save you time and effort while delivering superior performance.
3. Safety and Reliability: Cheap and poorly made hand tools can compromise safety. They may break or malfunction, leading to accidents and injuries. Quality tools undergo rigorous testing and meet safety standards, ensuring that they function reliably and minimize the risk of accidents. Investing in quality hand tools provides peace of mind and a safer working environment.
4. Efficiency and Productivity: Quality hand tools are designed to increase efficiency and productivity. They are often more precise, ergonomic, and efficient in their operation, allowing you to work faster and more effectively. This translates into completing projects more efficiently and achieving better results in less time.
5. Versatility and Adaptability: Quality hand tools are typically designed with versatility in mind. They can be used for a wide range of tasks and are adaptable to different projects. Their sturdy construction and reliable performance make them suitable for various applications, giving you more flexibility in your DIY endeavors.
6. Professional Results: Quality hand tools can help you achieve professional-level results in your projects. They offer better control, accuracy, and precision, allowing you to achieve clean cuts, tight fits, and well-executed tasks. Whether you are a DIY enthusiast or a professional, investing in quality tools can help you achieve top-tier results.
Remember, quality hand tools are an investment. While they may be more expensive upfront compared to cheaper alternatives, their durability and performance make them a worthwhile investment in the long run. Consider it as an investment in your skills, efficiency, and the quality of your work.
If you have any more questions or need further assistance, feel free to ask!

When it comes to tackling a project, having the right hand tools is essential to get the job done efficiently and effectively. Here are some tips to help you choose the right hand tools for your project:
1. Understand Your Project Requirements: Start by understanding the scope and requirements of your project. What kind of tasks will you be performing? Will you need tools for cutting, measuring, fastening, or any other specific tasks? Having a clear understanding of your project needs will guide you in selecting the appropriate hand tools.
2. Consider Quality: Investing in high-quality hand tools is important for both safety and durability. Look for tools made from reliable materials and with solid construction. Quality tools tend to last longer and provide better performance, making them a worthwhile investment in the long run.
3. Ergonomics and Comfort: Hand tools that are comfortable to hold and use can make a significant difference in your project experience. Look for tools with ergonomic designs and comfortable grips. This will help reduce fatigue and improve your overall productivity.
4. Research and Compare: Before making a purchase, it's a good idea to research and compare different brands and models. Read reviews from other users and compare prices and features. This will give you a better understanding of the available options and help you make an informed decision.
5. Consider Your Budget: While quality is important, it's also essential to consider your budget. Determine how much you are willing to spend on hand tools and look for options that align with your budget. Remember, it's not always necessary to buy the most expensive tools. There are often affordable options that offer good quality and performance.
6. Seek Expert Advice: If you're unsure about selecting the right hand tools for your project, don't hesitate to seek advice from experts. Visit a local hardware store or consult with professionals in the field. They can provide guidance based on your specific project requirements and help you make the right choice.
By following these tips, you can ensure that you choose the right hand tools for your project. Remember, having the right tools not only makes your work easier but also enhances the quality of your results.
If you have any more questions or need further assistance, feel free to ask!

Unlike painting bedrooms, hallways, and living rooms, painting a kitchen does not require a lot of wall space. Base cabinets, wall cabinets, sinks, appliances, and backsplashes take up a significant amount of room. A kitchen has fewer paintable surfaces. If a complete kitchen redesign seems intimidating and pricey, think about the straightforward steps below:
- Plan and prepare
Before you start painting, make sure you have all the necessary supplies, including paint, primer, brushes, rollers, tape, drop cloths, and sandpaper. Also, remove all the items from the kitchen, cover the floors and countertops with drop cloths, and clean the walls thoroughly.
2. Clean the walls
Because they are frequently oily, clean the kitchen wall surfaces thoroughly. To clean the surfaces before painting, use sugar soap or a strong detergent solution. Before letting the surface dry, thoroughly rinse it with warm water to remove all of the residues.
3. Set up the space
Before painting, masking tapes the edges of any tiles, appliances, trim, and worktops to create a smooth, clean edge to the painted surface. To collect any drips, it is best to also cover the floor, work surfaces, and appliances with plastic wrap.
4. Use the right paint
For a kitchen, it’s important to use paint that can withstand moisture, heat, and frequent cleaning. Look for a paint that is labeled “kitchen and bath” or “scrubbable.”
5. Begin with the top
Paint your kitchen from the roof down. This will prevent paint drips from landing on freshly painted surfaces. For ceilings and walls, use kitchen paint because it is durable and made to be readily cleaned. Instead of using a roller, paint the edges and smaller surface areas with a brush.
6. Paint cabinet doors
Clean cabinet doors with sugar soap or detergent, then fill any gouges or nicks in the doors with wood filler before sanding the areas and wiping them down. Use a special primer, and an undercoat to improve coverage. When painting around cabinets, appliances, and trim, use a small brush to ensure a clean, precise edge. Take your time and be patient, as rushing can lead to mistakes and a less professional-looking finish.
7. Paint woodwork
Start from top to bottom. Start with the windows. Then paint the door, door frame, and architrave, followed by the skirting. Paint the skirting last to avoid contaminating your brush with dirt or dust.
8. Paint by brush
Let the paint dry for about two hours. Dip the paintbrush in the paint and manually paint the areas that the roller could not reach. Avoid drips by minimally applying the paint with a brush. Areas that have been painted in the last few minutes are likely to be filmed over. So, confine your re-brushing to areas that were only recently painted.
9. Apply Additional Coats
When two or three coats of paint are applied, the colors deepen and reach their full potential. At a minimum, let the paint dry for at least a couple of hours, then re-roll and re-brush the paint one more time.
10. Finish up
Once the paint is dry, remove the tape carefully and touch up any areas that need it. Clean up your supplies and allow the paint to cure for a few days before moving furniture back into the room.

The correct colors must be chosen for a painting project, and labor and material costs must also be considered. The cost of paint and other materials will be considered if you do the painting yourself, but the labor cost should be considered if you hire a professional painter. It is always vital to plan and budget for your painting project. When making your painting project budget and strategy, keep in mind the following essential components.
- Decide on Your Colors
Choosing your colors is the first step in creating a budget for your painting project. Ask about the colors’ availability and an estimate of their cost at a dealer’s shop. Based on the contractor’s recommendations, you should be aware of the quantities you need. Based on the size of your home, they ought to be able to give you a ballpark figure.
- Determine the Materials Cost
Determine the actual amount of paint you will require for your job. Also, you can decide what supplies are required for the job. Knowing what kind of paint, you need and how many coats you’ll need to apply will help you determine pricing. After you have this data, you can start estimating the project’s cost. You’ll also need to account for the cost of supplies like tape, drop cloths, and brushes when painting your own house. You may prevent any unpleasant shocks later on by making the effort to budget for your project up front.
- Determine Your Labor Expenses
Finding out a professional painter’s hourly rate is the first step in the hiring process. You can estimate how many hours it will take them to finish the project once you know this. Decide how many hours a week you’re willing to spend painting if you’re doing it yourself. To avoid going over budget, be realistic about how long it will take to complete the project. You can make sure that your painting project stays on schedule and on budget by taking these considerations into account.

SUMMER SAFETY TIPS FOR FAMILIES
PREPARE FOR THE SUN AND HEAT
As your kids head outside, prepare for the sun and heat by
Protecting young skin: Receiving just one blistering sunburn before the age of 18 more than doubles kids’ chances of developing melanoma in adulthood. Protect their skin by applying a UVA/UVB sunscreen at least 20 minutes before going outside and use SPF 30 or higher. Reapply every two hours, more often if swimming or sweating.
stay hydrated
When temperatures rise, and especially when they are extreme, it is important for people, especially children, to stay hydrated.
A heat index of 35 degrees or higher can be dangerous for the infirm and young children.
Have them drink water regularly, take breaks from the heat, and wear lightweight clothing.
Vehicle related sunstroke prevention:
A child's body can heat up 3-5 times faster than an adult's.
Avoid heatstroke-related injury or death by never leaving your child alone in the car, not even for a minute.
Additionally, be sure to keep your car locked when you're not in it so kids can't get into it alone.
You can also use industrial air humidifiers that depend on water sprinklers intermittently, such type of devices are available with us at reasonable prices.
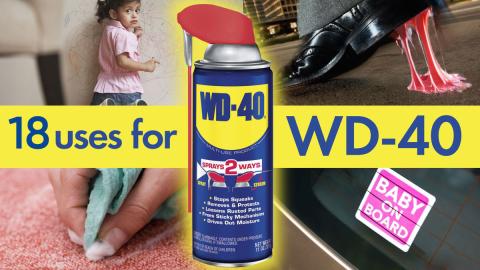
TOP 18 MOST UNUSUAL USES FOR WD-40 MULTI-USE PRODUCT
1 ) Keep grass from sticking to lawnmower blades.
Lawn mower upkeep is easy with WD-40® Multi-Use Product. Spray blades before mowing to keep them clean, sharp and corrosion-free. Your post-core clean-up will be fast and simple; Wipe down the blades, and your lawn mower will be ready for its next spin around the green.
2) Get baked-on bird droppings off car and truck exteriors.
Protect your vehicle’s finish—and resale value. Spray a healthy coat of WD-40 Multi-Use Product onto the affected surfaces then wipe away bird droppings with a rag. Keep a can on hand in areas where birds congregate, such as barns and lakeside parking spots.
3) Make snow roll right off your snow shovel.
Cut down on snow shoveling time with this neat trick: Spray the original WD-40 formula on both sides of your shovel before you start. Watch snow, ice and slush slide off the surface. No more stopping every few steps to dislodge built-up snow from your shovel.
4) Get tree sap off a variety of surfaces.
One of the stickiest materials known to nature, tree sap is no match for WD-40 Multi-Use Product. Carefully scrape off as much residue as possible, and then rub a little of the original WD-40 formula in to break up the rest of the sap.
5) Unstick piano keys.
Everyone knows WD-40 Multi-Use Product is a DIYer’s best friend, but musicians need to keep a can on hand, too. Use it to loosen stuck piano keys and get back to the music. The WD-40 EZ-REACH® has a bendable straw that can lubricate hard-to-reach piano parts easily.
6) Loosen broken keys from locks.
A broken key is a guaranteed day-ruiner…until WD-40 Multi-Use Product comes to the rescue. Whether you’re working on a car door, a tool shed lock, or a stuck keyed safe, use WD-40’s Smart-Straw® to loosen lock components and remove the broken key.
7) Wipe off insects from your vehicle’s front grill.
Did you spring for the most expensive car wash option and still emerge with insect remains coating your car or truck’s front grill? Soak the grill with WD-40® Multi-Use Product, then use a rag to wipe away all the sticky remnants of your last road trip.
8) Prevent foliage from sticking to pruning shears.
WD-40 Multi-Use Product can make yard work much less of a chore. Pre-treat your pruning shear blades with the original WD-40 formula for sharper cuts, less tool corrosion and easier clean-up.
9) Make dirt slide off hole diggers.
Whether you're planting trees, building a deck, or repairing fences, be sure to start by spraying your post hole diggers with WD-40 Multi-Use Product. Digging will be cleaner and faster, and your clean-up and storage will be simplified.
10) Free stuck LEGO® blocks.
It’s a common parenting request: Unstick fused blocks so the fun can go on! Use WD-40 Smart Straw to target even the tiniest pieces and then simply pull them apart. Be sure to wash the blocks with soap and wipe clean before playtime resumes.
11) Eliminate roofing tar stains on clothing.
Roofers swear by this little-known WD-40® Multi-Use Product trick: Pre-treat gooey, oily tar stains by spraying the original WD-40 formula, wait for 30 seconds to 10 minutes (depending on the severity of the stain) Then wipe with a cloth and throw in the wash.
12) Break-in baseball mitts.
Every baseball player has a favorite break-in method, but here’s one of the best: Spray the baseball glove with the original WD-40 formula, place a baseball inside and wrap it with rubber bands. Leave the glove overnight to soften and shape it around the ball.
13) Keep dirt and mud from sticking to ATVs.
Off-roading is fun; Cleaning up ATVs after a long, muddy day isn’t. Before you leave the beaten path, spray ATVs with WD-40 Multi-Use Product to help keep dirt, dust and corrosion at bay.
14) Keep clay from sticking to molds during crafting.
Keep the creativity flowing with WD-40 Multi-Use Product. Spray the inside of molds with the original WD-40 formula before packing them with clay for easy removal and clean-up.
15) Create interesting artworks.
If you spray WD-40 Multi-Use Product on canvas or poster board and let it dry, you’ll get an interesting textured base to work from. Or mix a few drops of it with acrylic paint and pour it onto your canvas for unique liquid cell shapes.
16) Prevent rust on hide-a-key containers.
A hidden key is no help if it’s stuck inside its box! Spray the moving parts of both house and car hide-a-key containers with WD-40 Multi-Use Product to prevent corrosion—and the inconvenience of being locked out.
17) Lubricate luggage zippers.
Don’t struggle with your suitcases. Spray WD-40 Multi-Use Product on stubborn luggage zippers to make packing and unpacking a snap. The Smart-Straw helps target the zipper and minimize the mess.
18) Removes crayon from a variety of surfaces.
Who didn't take crayons to forbidden surfaces when they were a kid? Here’s a pro-parent tip: the original WD-40 formula can help you restore a variety of surfaces back to their pre-crayon condition.